

close
Choose Your Site
Global
Social Media
Views: 0 Author: Site Editor Publish Time: 2026-11-03 Origin: Site


Processing Note:
Cutting & Edge-Finishing of Acrylic Solid Surface
1. Cutting
·Use a carbide-tipped circular saw or CNC router. Keep feed rate steady and avoid forcing the blade, which causes chipping and internal stress cracks.
·Leave 2–3 mm allowance on cut lines for final trimming and edge finishing.
· Support the sheet fully on both sides of the cut to prevent sagging or snap-back.
·For sink and hob cut-outs, drill corner relief holes first, then cut — this prevents corner cracks that appear later under load.
·Sequence: rough sand (120–180 grit) → medium (240–320) → fine (400–600) → polish (800–1200) → buffing compound.
·Keep the tool moving; dwelling on one spot generates heat and burns the surface.
· For butt joints and seams, use the manufacturer's color-matched adhesive. Clamp and let it cure fully before sanding flush — sanding too early opens the seam.
· Finish with a sealing polish to close surface pores. This matters in hotel use: unsealed edges absorb moisture and darken over time, especially around sinks and high-humidity bathrooms.
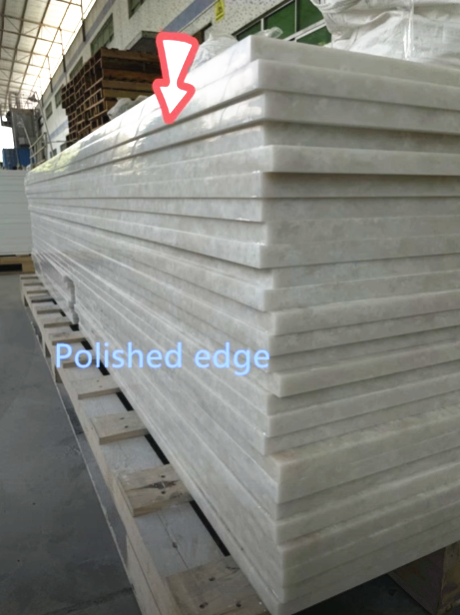
3. Handling &Installation Notes
·Acrylic solid surface is thermoformable but avoid direct heat sources and sharp impact on finished edges.
·When installing countertops, allow a small expansion gap at walls and fixed points.
· Use flexible adhesive at the substrate interface, not rigid fixing, to absorb minor movement.
4. Common Issues to Avoid
· Chipped edges from dull blades or too-fast feed.
·Visible seam lines from insufficient clamping pressure or mismatched adhesive color.
·Hairline cracks at cut-out corners from missing relief holes.
·Dull or patchy finish from skipping grit steps.


